


Business Central Integrations using a BC Username and Web Service Key will be Impacted starting April 2022
A commonly used method that applications external to Business Central use when connecting to and authenticating to Business Central Specifies is the use of a Web Service Key. This is a key generated from the User Card in Business Central.
The Web Access Key combined with a Business Central Username will no longer allow authentication to Business Central after April 2022.
In order for external applications to re-connect to Business Central, Business Central Administrators will need to reconfigure their connections using OAUTH 2.0 to Authorize Business Central Web Services.
Connecting to BC Web Services via OAUTH 2.0 will require technical resources, updates to your Azure Active Directory account, creation of a token that will be used as part of the new credentials needed to access BC webservices, and updates on the side of the external applications that need to connect to BC.
The following steps will need to be completed to obtain the information that will be used when re-connecting to Business Central Web Services.
Please Note: Prior to initiating these steps,
Please follow these steps. Contact Velosio via the Support Portal with any questions: https://support.velosio.com/.
• Confirm your user has SUPER permissions in https://businesscentral.dynamics.com/TENANT_ID/ and this user is also able to login Home - Microsoft Azure.
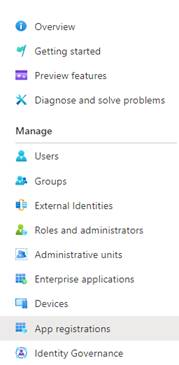
• Go to Azure Active Directory.

• Go to App Registration.
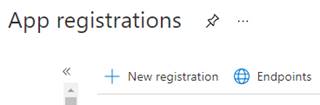
• Register our new app (Business Central) in the + New registration.
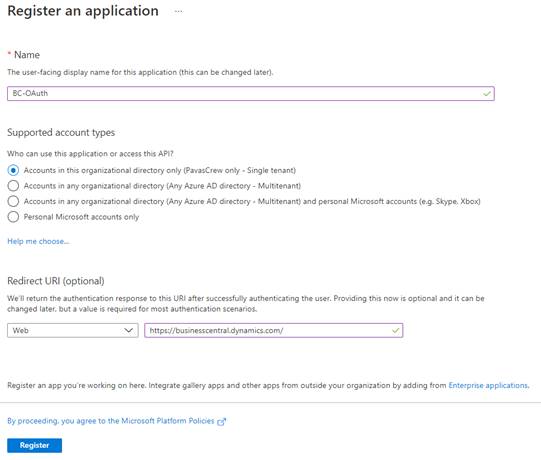
• Assign an app name such as BC-OAuth, choose who can use this app or access the API, we should select single tenant, for Redirect URL choose web and add BC URL and register our app.
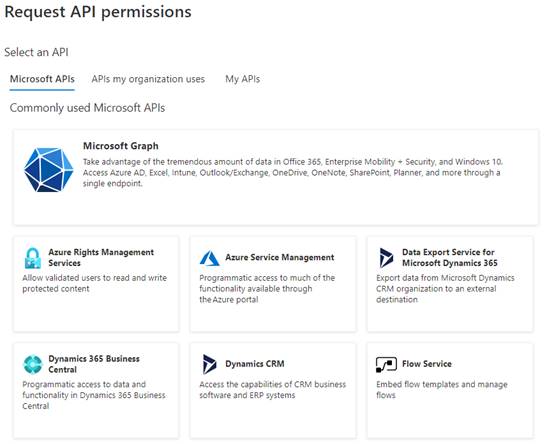
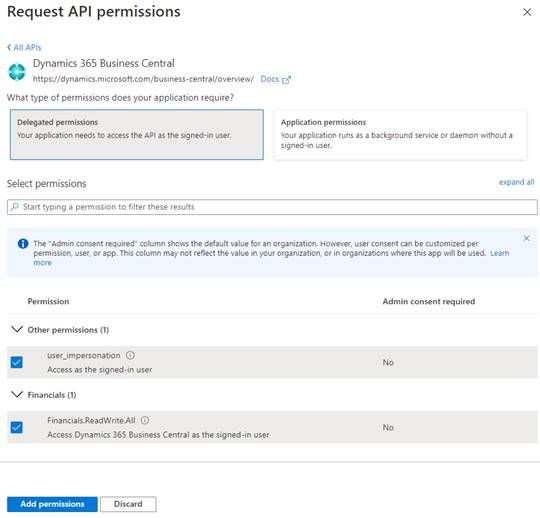
• Go to API permissions and click + Add a permission.

• After clicking + Add a permission, the available API permissions will come up, if you can’t see Business Central is because the user doesn’t have a valid license, or the trial has not been started.
• After clicking Business Central, we will need to click Delegated Permissions and add user_impersonation and Finance if needed.
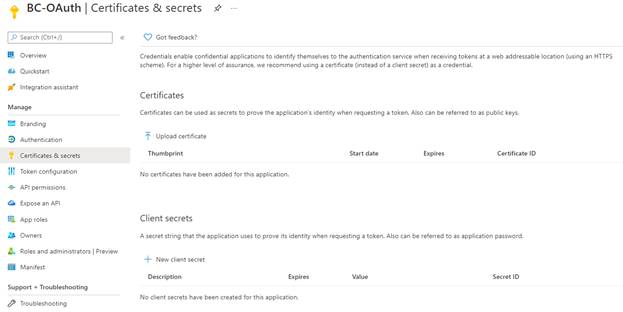
• Now we will need to create a new certificate for our app by clicking the + New client secret button.
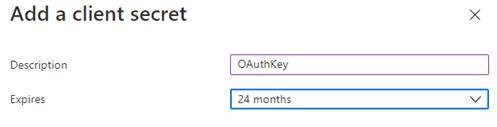
• Add a client secret, add some description, and assign when it expires. The add button can be found at the end of the page.
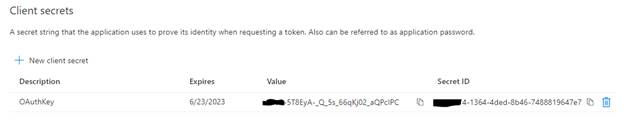
• After creating the client secret, we will need to copy the Value since later will be encrypted, so please copy this info in a secure place.
• Now we will need an Odata V4 Web Service URL from business central to test our connection.

• We will test our connection through Postman.
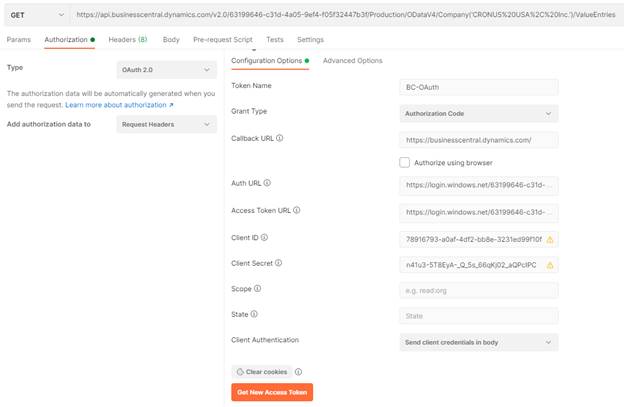
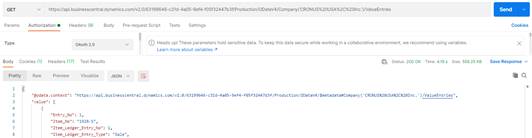
1. In the top field we will use Get and add the web service URL from our BC environment
2. In Authorization tab we can find Type and should be OAuth 2.0
3. Token Name we can use the same name assigned to our registered app in Azure
4. Grant Type: Authorization Code
5. Callback URL: Will be the specified on step 5 https://businesscentral.dynamics.com/
6. Auth URL: https://login.windows.net/TENANT_ID/oauth2/authorize?resource=https://api.businesscentral.dynamics.com (Please add your tenant id)
7. Access Token URL: https://login.windows.net/TENANT_ID/oauth2/token?resource=https://api.businesscentral.dynamics.com (Please add your tenant id)
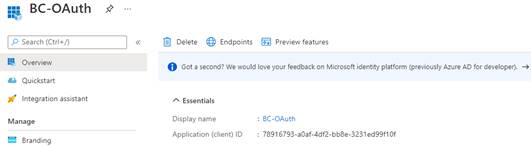
8. Client ID: Can be found in your app created in Azure
9. Client Secret: Is the VALUE generated from your certificate from step 11
10. Scope: Empty
11. State: Empty
12. Client Authentication: Send Client Credentials in Body
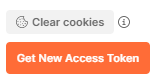
• Now we can Generate our Access Token by clicking the Orange Get New Access Token from Postman.
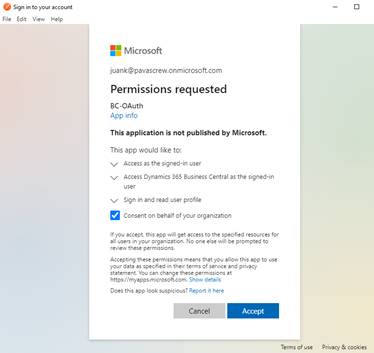
• After clicking the Get New Access Token a Postman pop up will appear to authenticate with your BC/Azure User.
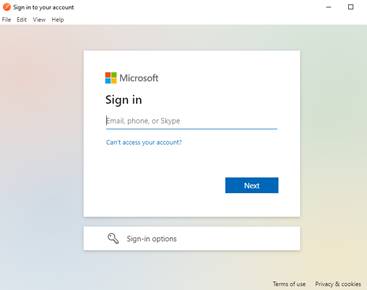
• You will need to consent to some required permissions on behalf of your organization.
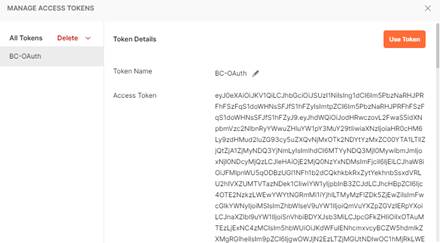
• The Token will be generated, and we can click on Use Token.
• Our Authentication will be ready to use.
A commonly used method that applications external to Business Central use when connecting to and authenticating to Business Central Specifies is the use of a Web Service Key. This is a key generated from the User Card in Business Central.
The Web Access Key combined with a Business Central Username will no longer allow authentication to Business Central after April 2022.
In order for external applications to re-connect to Business Central, Business Central Administrators will need to reconfigure their connections using OAUTH 2.0 to Authorize Business Central Web Services.
Connecting to BC Web Services via OAUTH 2.0 will require technical resources, updates to your Azure Active Directory account, creation of a token that will be used as part of the new credentials needed to access BC webservices, and updates on the side of the external applications that need to connect to BC.
The following steps will need to be completed to obtain the information that will be used when re-connecting to Business Central Web Services.
Please Note: Prior to initiating these steps,
- Identify any existing integrations to BC that Authenticate using a Web Service Key.
- Determine if the application supports OAUTH 2.0 Authentication by contacting the service provider.
- Of the application is using a Web Service Key and does not support OAUTH 2.0 Contact Velosio.
Please follow these steps. Contact Velosio via the Support Portal with any questions: https://support.velosio.com/.
• Confirm your user has SUPER permissions in https://businesscentral.dynamics.com/TENANT_ID/ and this user is also able to login Home - Microsoft Azure.
• Go to Azure Active Directory.
• Go to App Registration.
• Register our new app (Business Central) in the + New registration.
• Assign an app name such as BC-OAuth, choose who can use this app or access the API, we should select single tenant, for Redirect URL choose web and add BC URL and register our app.
• Go to API permissions and click + Add a permission.
• After clicking + Add a permission, the available API permissions will come up, if you can’t see Business Central is because the user doesn’t have a valid license, or the trial has not been started.
• After clicking Business Central, we will need to click Delegated Permissions and add user_impersonation and Finance if needed.
• Now we will need to create a new certificate for our app by clicking the + New client secret button.
• Add a client secret, add some description, and assign when it expires. The add button can be found at the end of the page.
• After creating the client secret, we will need to copy the Value since later will be encrypted, so please copy this info in a secure place.
• Now we will need an Odata V4 Web Service URL from business central to test our connection.
• We will test our connection through Postman.
1. In the top field we will use Get and add the web service URL from our BC environment
2. In Authorization tab we can find Type and should be OAuth 2.0
3. Token Name we can use the same name assigned to our registered app in Azure
4. Grant Type: Authorization Code
5. Callback URL: Will be the specified on step 5 https://businesscentral.dynamics.com/
6. Auth URL: https://login.windows.net/TENANT_ID/oauth2/authorize?resource=https://api.businesscentral.dynamics.com (Please add your tenant id)
7. Access Token URL: https://login.windows.net/TENANT_ID/oauth2/token?resource=https://api.businesscentral.dynamics.com (Please add your tenant id)
8. Client ID: Can be found in your app created in Azure
9. Client Secret: Is the VALUE generated from your certificate from step 11
10. Scope: Empty
11. State: Empty
12. Client Authentication: Send Client Credentials in Body
• Now we can Generate our Access Token by clicking the Orange Get New Access Token from Postman.
• After clicking the Get New Access Token a Postman pop up will appear to authenticate with your BC/Azure User.
• You will need to consent to some required permissions on behalf of your organization.
• The Token will be generated, and we can click on Use Token.
• Our Authentication will be ready to use.